If you are organizing a concert, church service, school play, or private event, you may be asking: what is a simple setup for stage lighting? You do not need a huge budget or a professional lighting crew to create a clean, effective stage look. With the right fixtures and a basic plan, you can light a stage simply and professionally.
A simple stage lighting setup usually includes three things:
A few key fixtures – usually LED PAR lights, a moving head beam light, and a blinder or strobe.
A basic layout – front light, side light, and back light.
A simple control system – a DMX controller or a small lighting console.
In this guide, we explain how to build a simple stage lighting setup step by step. Whether you are lighting a church, a club, a theater, or an outdoor event, these principles will help you get started.
Why a Simple Setup Is Often Better
Many beginners try to buy too many lights or copy a large concert rig. The result is often messy, hard to control, and expensive.
A simple setup is better because it is:
Easier to control – fewer fixtures mean fewer DMX channels and less confusion.
Faster to set up – you can install and test it in a few hours.
More reliable – fewer cables, fewer power issues, fewer failures.
More affordable – you can invest in quality fixtures instead of quantity.
At KALE Lighting, we supply professional stage lighting equipment for concerts, churches, events, and theaters. Our products are designed to be powerful, reliable, and easy to use, even for beginners.
Step 1: Define Your Purpose and Space
Before you buy or set up any lights, answer these questions:
What kind of event is it? A concert needs more energy and movement. A church service needs soft, warm light. A theater play needs focused, directional light.
How big is the stage? A small stage needs fewer fixtures. A large stage needs more coverage.
Is it indoors or outdoors? Outdoor events need waterproof or weather-resistant fixtures.
Do you need movement? If you want beams sweeping across the stage, you need moving head lights.
What is your budget? A simple setup can be built with a few hundred dollars or a few thousand, depending on your goals.
Knowing your purpose helps you choose the right fixtures and avoid wasting money.
Step 2: Choose a Basic Fixture Combination
For a simple stage lighting setup, we recommend starting with these four types of fixtures:
1. LED PAR Lights (For Color Wash)
LED PAR lights are the foundation of most simple setups. They wash the stage with color and create a base look. You can use them for front light, side light, or uplighting.
Recommended: KALE 18x10W LED PAR Light – bright, energy-efficient, and available in RGBW color mixing. It is ideal for churches, events, and small concerts.
2. Moving Head Beam Light (For Dynamic Beams)
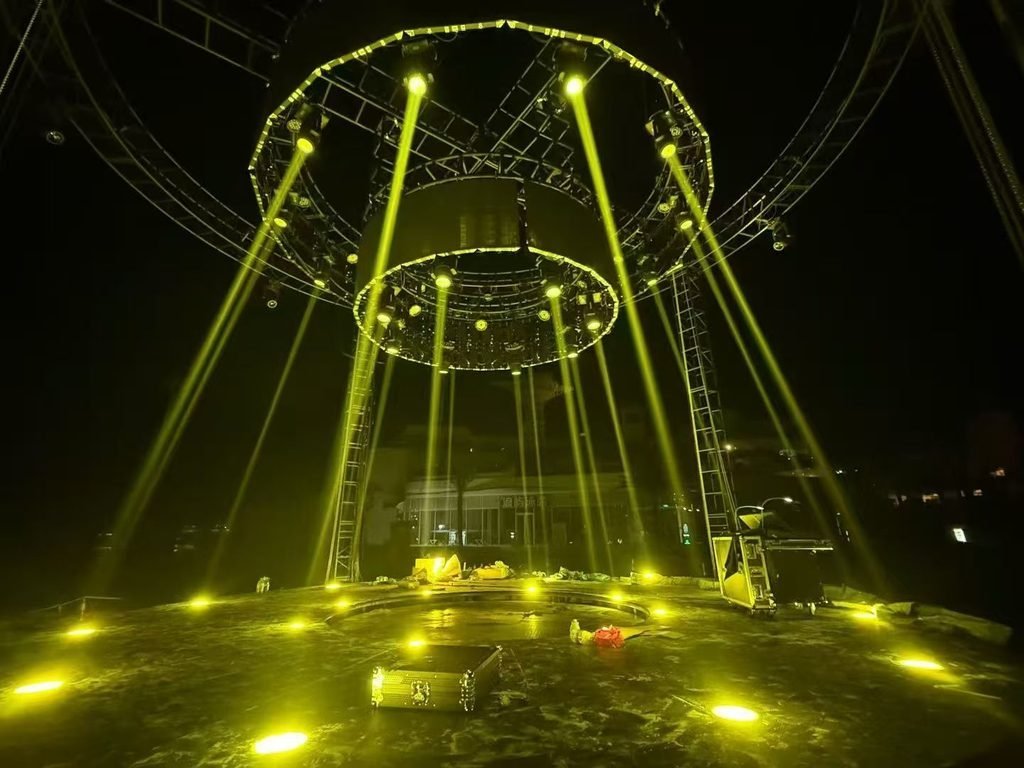
A moving head beam light creates sharp, narrow beams that cut through haze and smoke. It adds energy and movement to concerts, parties, and clubs.
Recommended: KALE 295W Moving Head Beam Light – powerful, fast, and reliable. It is perfect for creating dramatic beam effects.
3. LED Blinder or Strobe (For Impact)
A blinder or strobe creates strong flashes of white light. It is used for climax moments in concerts, parties, and high-energy events.
Recommended: KALE 4x100W LED Blinder Light or 960PCS Strobe + White Flash Light – both deliver intense, attention-grabbing effects.
4. Fog Machine (For Atmosphere)
A fog machine makes the beams visible in the air. Without fog or haze, beam lights are much less impressive.
Recommended: KALE 900W Fog Machine – reliable, fast-heating, and perfect for concerts, stages, and events.
Optional: DMX Controller
To control your lights, you need a DMX controller. A simple controller like the KALE DMX192 Controller can manage multiple fixtures and scenes.
Step 3: Plan Your Fixture Placement
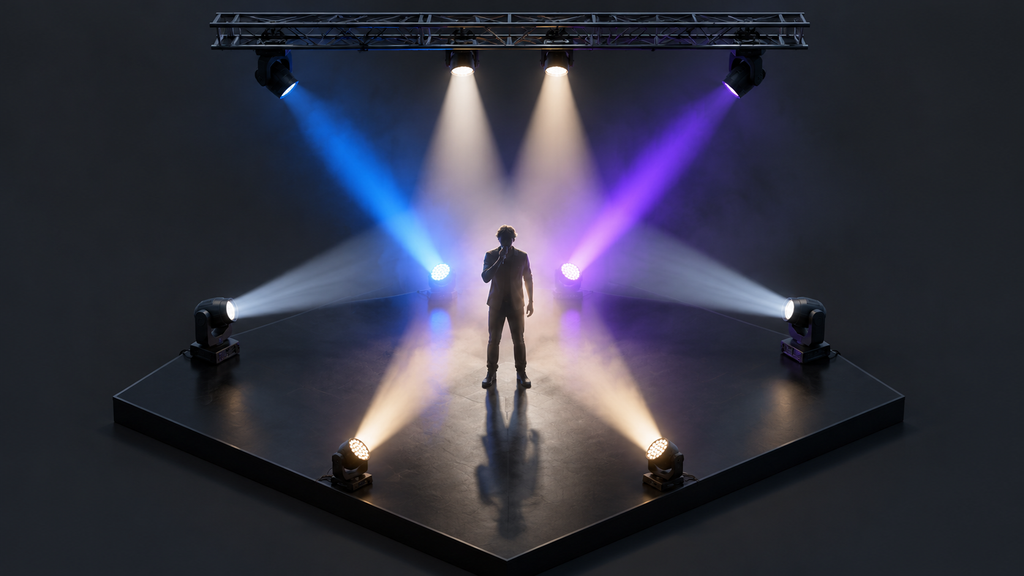
A simple stage lighting setup usually uses three positions:
Front Light
Place LED PAR lights at the front of the stage, facing the performers. This makes them visible and ensures the audience can see their faces.
Use 2 to 4 PAR lights depending on stage width.
Aim for warm white or soft color.
Side Light
Place lights on the left and right sides of the stage. Side light creates depth and highlights the performers’ movement.
Use PAR lights or moving heads.
Angle them slightly toward the center.
Back Light
Place lights behind the performers, facing the audience. Back light separates the performers from the background and creates a halo effect.
Use moving head beam lights or PAR lights.
Aim for cool colors like blue or purple for contrast.
Top Light (Optional)
If you have truss above the stage, you can add top light. Top light creates strong shadows and dramatic effects.
Step 4: Connect Power and DMX
Once your fixtures are in place, connect them properly:
Power: Use safe power cables and avoid overloading circuits. If you have many lights, use a power distribution box.
DMX: Connect the DMX controller to the first fixture, then daisy-chain to the next. Use DMX cables, not microphone cables.
Addressing: Set a unique DMX address for each fixture. For example, fixture 1 starts at 001, fixture 2 at 017, and so on.
If you are using the KALE DMX192 Controller, you can easily set addresses and create scenes.
Step 5: Set Up Your DMX Controller
A simple DMX controller allows you to:
Turn lights on and off
Change colors
Adjust brightness
Create scenes
Run chases and effects
Start with a few basic scenes:
Warm front light – for speeches and church services.
Color wash – for music and performances.
Beam chase – for high-energy moments.
Blackout – for transitions.
Practice switching between scenes during rehearsal.
Step 6: Test and Adjust
Before the event, test everything:
Check that all lights turn on.
Check DMX control and addresses.
Check color and brightness.
Check fog machine output.
Check cables and power.
Run through the event timeline.
Make adjustments based on what you see. A simple setup should look clean and professional, not cluttered.
FAQ: Simple Stage Lighting Setup
What is the simplest stage lighting setup?
The simplest setup is 2–4 LED PAR lights for front light, 1–2 moving head beam lights for back light, and a DMX controller. Add a fog machine for atmosphere.
How many lights do I need for a small stage?
For a small stage, 4–6 fixtures are usually enough: 2–4 PAR lights and 1–2 moving heads.
Can I use stage lights without DMX?
Yes, many lights have sound-activated or auto modes. But DMX gives you better control and a more professional look.
What is the best first stage light to buy?
Start with LED PAR lights. They are versatile, affordable, and easy to use. Then add a moving head beam light.
Do I need a fog machine for stage lighting?
A fog machine is not required, but it makes beam lights much more visible and dramatic.
How do I power multiple stage lights?
Use a power distribution box and calculate the total wattage. Do not overload a single circuit.
Where can I buy simple stage lighting equipment?
KALE Lighting supplies professional stage lighting equipment for concerts, churches, events, and theaters. We offer factory-direct pricing, fast shipping, and reliable support.
Conclusion
A simple stage lighting setup does not need to be complicated. With a few LED PAR lights, a moving head beam light, a blinder or strobe, a fog machine, and a DMX controller, you can create a professional look for any event.
At KALE Lighting, we help clients in Africa and around the world build simple, effective stage lighting setups. Our product range includes moving head beam lights, LED PAR lights, blinders, strobes, fog machines, and DMX controllers.
If you need help choosing the right lights for your stage, contact us today.
Facebook: KALE Lighting
WhatsApp: +86 188 1931 7886
Website: www.hello-lite.com | www.kalelight.com